

How To Install Odbc Driver In Windows 7 64 Bit
Installing and Configuring the ODBC Driver for Windows
Windows utilizes named data sources (DSNs) for connecting ODBC-based client applications to Snowflake.
In this Topic:
-
Prerequisites
-
Operating System
-
Administrator Privileges
-
Visual C++ Redistributable for Visual Studio 2015
-
-
Footstep 1: Install the ODBC Driver
-
Footstep 2: Configure the ODBC Driver
Prerequisites
Ambassador Privileges
To install the ODBC commuter, you need administrator-level privileges so that the driver can be installed in the C:\Program Files directory.
Visual C++ Redistributable for Visual Studio 2015
To employ Snowflake ODBC Driver in a Windows environment, you take to showtime install Visual C++ Redistributable for Visual Studio 2015. The installation file is available for download from:
Footstep 1: Install the ODBC Commuter
-
If you haven't already downloaded the latest commuter version, download it now. For details, come across Downloading the ODBC Driver.
-
snowflake64_odbc-<version>.msi
-
snowflake32_odbc-<version>.msi
-
-
Double-click on the downloaded .msi file:
Annotation
The commuter is installed in
C:\Programme Files.
Step ii: Configure the ODBC Driver
To configure the ODBC driver in a Windows environment, create a DSN for the driver:
-
Launch the Windows Data Source Administration Tool:
Search on your Windows machine for the launcher for the ODBC Data Source Administration Tool:
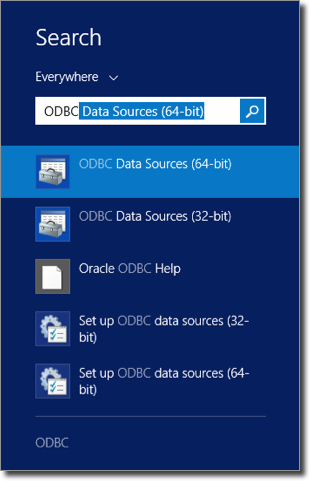
Once yous find the ODBC administration tool, click on the tool to launch information technology and display the ready window.
-
Verify that the Snowflake ODBC driver is installed:
Navigate to the Drivers tab in the set upwards window and verify that the driver (SnowflakeDSIIDriver) appears:
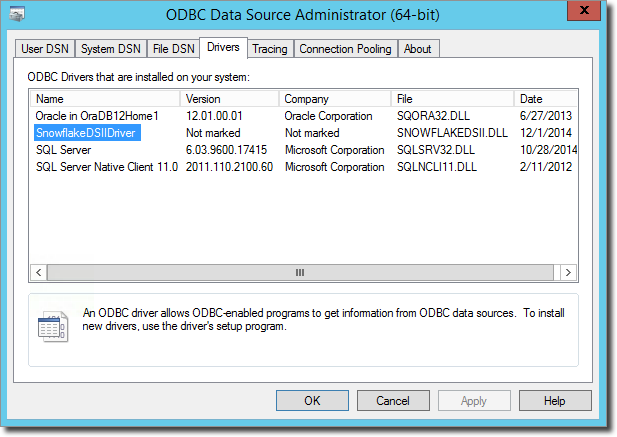
If you practise non encounter SnowflakeDSIIDriver, then the Snowflake ODBC commuter installation did not complete successfully and you need to re-install information technology.
-
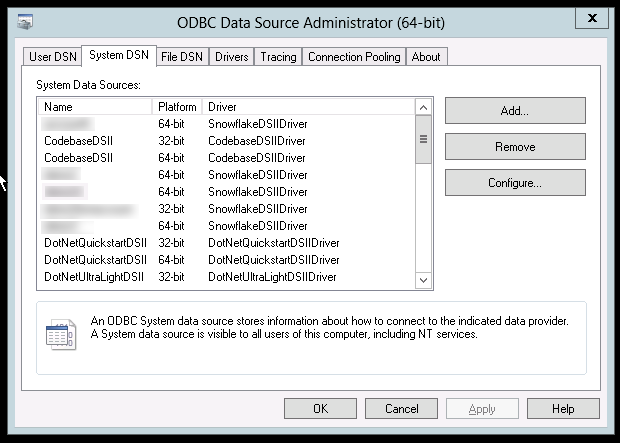
Create a new DSN:
-
Navigate to the User DSN or Organisation DSN tab and click the Add button:
-
Select SnowflakeDSIIDriver from the list of installed drivers.
-
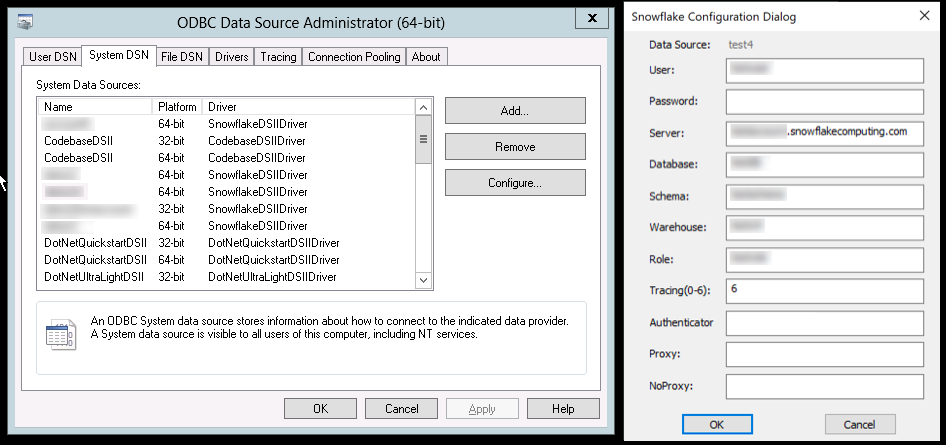
Enter the connection parameters for the driver.
In the fields provided in Snowflake Configuration dialog, enter the parameters for the DSN:
When entering parameters, note the post-obit:
-
Information Source, User and Server are the simply parameters required to create a DSN.
For more information on these parameters, see Required Connection Parameters.
-
All other parameters in the dialog are optional. In item, the proxy-related parameters should be specified only if you are using a proxy, and the Authenticator should be inverse from the default ("snowflake") but if needed. For more details about ODBC Information Source parameters, see ODBC Configuration and Connection Parameters and, in particular, Optional Connexion Parameters.
-
The Password field accepts a value, but does not store the value. This is a security precaution to ensure passwords are never stored directly in the driver.
Note
-
The ODBC driver supports additional parameters that are not displayed in the dialog. These parameters can only exist ready in the Windows registry using regedit.
For descriptions of all the parameters, come across ODBC Configuration and Connection Parameters.
-
Specifying a value in the Authenticator field is simply required if you are using federated authentication. For more information, see the
authenticatorparameter description in ODBC Configuration and Connection Parameters.
-
-
Click OK to create the DSN.
-
You tin now reference this DSN in ODBC-based customer applications for connecting to Snowflake.
Source: https://docs.snowflake.com/en/user-guide/odbc-windows.html
Posted by: brownacle1985.blogspot.com
0 Response to "How To Install Odbc Driver In Windows 7 64 Bit"
Post a Comment